Got a game in Wednesday, versus a fellow I've played once before, at the Duelling Grounds. Mid-war - my first from that period in FoW, and it was an absolute blast, one of the best mini games I've played, period. Solid and engaging opponent, back and forth swings, both of us playing balls-in, and it came down to a climactic company (platoon) morale check. AAR follows.
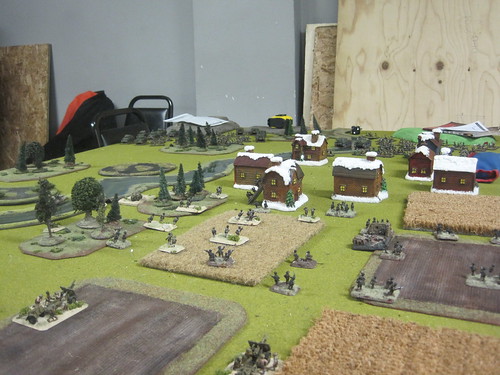
Pre-game: I came to the store with a couple of late war lists, but hadn't anticipated a mid-war game. Upon arrival, my opponent (Sodbuster on the THMG forums) mentioned he wanted to play a mid-war game with his Gurka / Indian force (I figured I could chalk up the anachronism to another trick of the wiley fascists). I was able to borrow a copy of the Eastfront book from the store, and managed to more or less convert the list I had planned for the day. It helped that the Soviet stuff I have was picked for flexibility - all my units can be used in both mid- and late-war, albeit with different points values and force orgs. We played a no-retreat scenario. It's a prepared defence scenario, including ambush, with the attacker approaching down the length of the table. As a mechanised infantry force vs regular infantry, I was the default attacker, and had the first turn. I deployed with heavy mortars to my rear, a two platoon company of infantry on each flank, and my armour positioned more or less centrally, with the ability to move to support either flank. I put my Su-85s on the right flank. With him able to place a unit in ambush, I needed to "guard" my flanks. You can see the deployment in the picture below, taken from my opponent's side of the table.
Turn 1: I moved up with pretty much everything I had, including my mortar observer, who took up residence in a house on the outside of town. My morters tried a barrage, but I was confronted with one of the inherent challenges to using Soviets mid-war. Unlike in late war, where Soviets are trained, in mid-war they are conscript. Remember the scene in "Enemy at the Gates" where the troops are shuttled off the train and into combat? Same idea. Being conscript makes it much more difficult to actually get hits in a barrage, and despite the size of my battary (it matters, natch), I failed to hit any enemy units. On his turn, he more or less kept his units hunkered down, and fired a counter barrage that managed to clear a swath of infantry on my left. Brit arillery in large battaries has the option to either concentrate firepower in a regular template, or spread it out over a larger area. He spread it out. You see all that empty space on the right side of the picture below?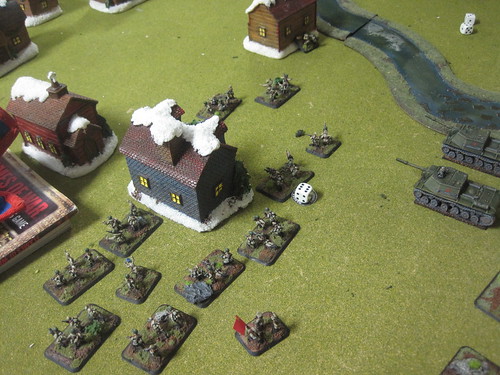
That used to be occupied by infantry. Again, the effect of conscripts came into play (they are easier to range in on, and hence, more likely to get caught by the artillery template).
Turn 2: Again, I advanced. The infantry on the left, disliking the effect of my opponent's artillery, moved toward the village, taking what cover they could. My morters managed to pick off one of his big guns, with the added effect of pinning his artillery (any hit from an artillery barrage pins the platoon hit, which is a critical role of artillery in-game). My big guns, Su-152s, moved up and took a shot at some enemy infantry lurking in the houses, but missed. His troops were hidden, hadn't revealed their position by moving or shooting, and I had moved, making them extremely difficult to hit. At his point, I took a gamble, and had my Shermans swing across the ford in the river, moving at the double to get into a degree of cover, and be in position to assault next turn.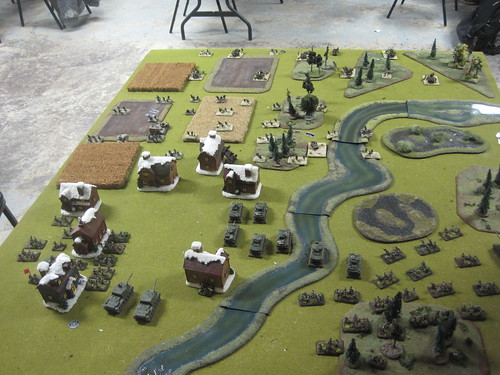
Moving at the double means my tanks go faster, but they become much more vulnerable to enemy fire (twice the dice for shooting). I was betting that he wouldn't unpin his artillery, and the gamble worked. With his artillery unable to fire, and my Shermans out of line of sight of his AT, he elected to keep his infantry hidden, and held fire. He did, however, manage to bring on two of his reserve platoons - veteran British infantry, and a pair of portee 6 lbrs.
Turn 3: At this point, the game got bloody. I moved up my shermans, and with a combination of machine gun and rifle fire, pinned the Indian infantry guarding the objective on the right flank. Pinning is critical in assaults, as it radically reduces the amount of fire my tanks face as they move to assault, and with his infantry loaded with PIAT guns and other AT assets, the less I faced, the better. In town, the SU-152s fired on the Ghurkas hiding in the house on the outskirts of town, and levelled the roof around their ears.
I quite like the SU-152 (the big assault guns at the bottom of the picture above). They don't throw out a lot of shots, but the ones they do are petty damn big. I first took them due to an opponent who regularly sheltered Fearless Veteran SS in built-up areas. Those kind of troops, in that kind of cover, are almost almost impossible to dig out, but the SU-152 is pretty much designed to make that unecessary. If one team in a building is hit, all are hit; unarmoured targets automatically fail their save, and the Su-152s have unsurpassed firepower.
On the right, the Shermans moved in, and began a long, bloody fight.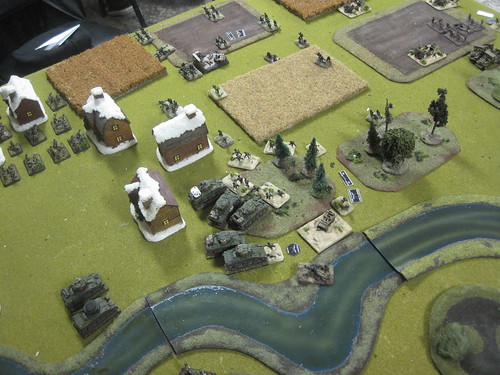
The way assaults work in FoW, if you don't eliminate all enemy teams within 4" of your assaulting teams (i.e., win the assault), your opponent can pass a morale check to counter-attack. If they don't win in turn, you can pass a morale check and counter attack back, and so on, until someone either chooses to break off, or fails a morale check and is compelled to do so. Both sides in this assault were fearless, however, and I was attacking with conscript tanks. This meant that my tanks weren't terribly effective at killing his units, while the bulk of his teams had to struggle to get through my armor (possible, but hard). This meant a slow, back and forth attrition struggle for the objective, with each roll to counter-attack critical to the outcome. One tense moment came when my command Sherman bailed out. While it wasn't destroyed, if I broke off the combat, it would be left behind, overwhelmed by pursuing Ghurkas. In the end, he failed a roll first, and retreated, and my somewhat mauled Shermans moved to consolidate their hold on the objective, which was now contested - both of us had units within 4".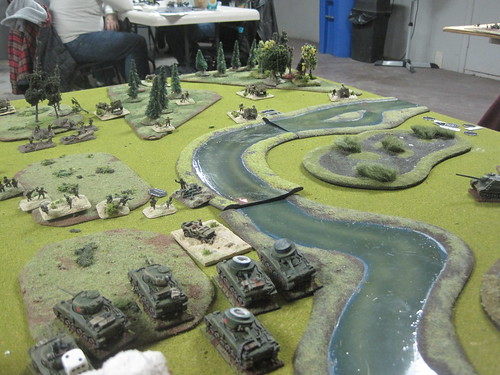
On his turn, he unpinned his artillery, which proceeded to drop another template on my infantry, killing several, and revealed his ambush - three anti-tank guns, which unloaded on the remaining Shermans, destroying three. Ouch.
Turn 4: My Sherman commander unpinned, as did the infantry that had received the artillery barrage . . . eventually. At this point, we witness one of the less savory elements of the Russian morale system. As well as benfitting from the usual advantages of support from independent command teams (a re-roll), attached Kommisars can motivate infantry and gun teams . . .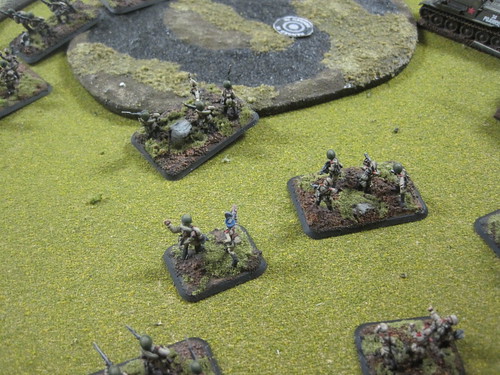
. . . by executing one of them.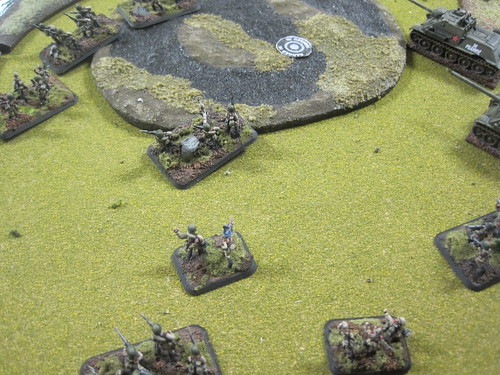
In this case, effectively. My Shermans moved up, intending to assault the remaining Ghurkas, only to have two of them bog down in the woods (a 1 in 36 chance!!). On the left, my infantry moved up to assault . . .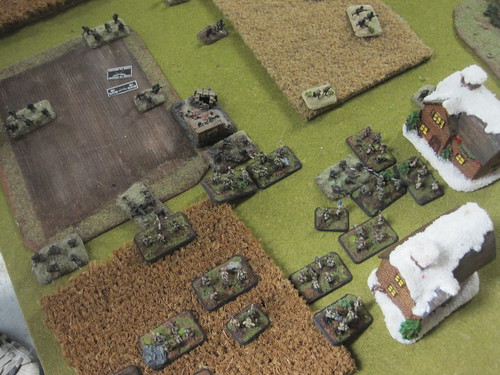
. . . but were driven back by defensive fire (I hadn't been able to pin the platoon I was assaulting, as I was once again firing at well-hidden troops). On the right, I moved my SU-85s up to support the assault I anticipated in the next turn, one of them bogging down in the process. In the centre, the SU-152s moved up, and lent a little supporting fire to the overall action. In his turn, my opponent moved up his portee guns to point-blank range, and one them bogged down in the woods. His artillery and infantry on my left chewed up my infantry company a bit more, and his AT guns turned their attention to the SU-85s, destroying two.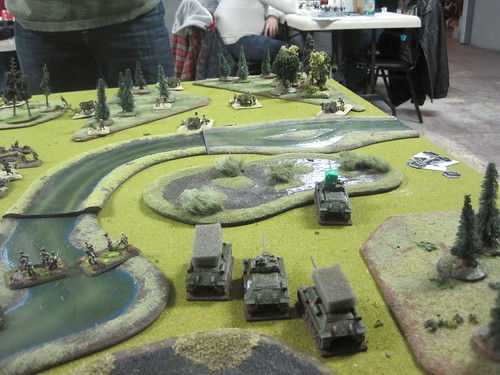
The remnants of his Ghurkas assaulted my Shermans.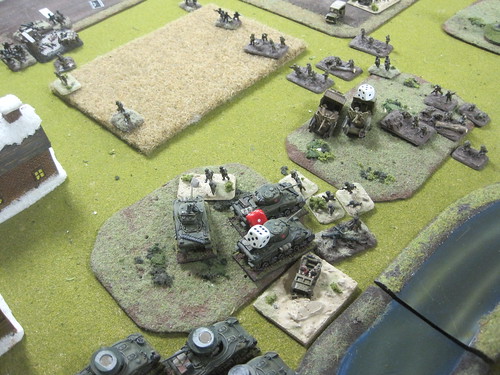
Remember, only one of my Shermans was unbogged, and able to fight back. Even with his depleted platoon, my opponent was able to destroy the active tank, and the other two, bing bogged down, were overwhelmed.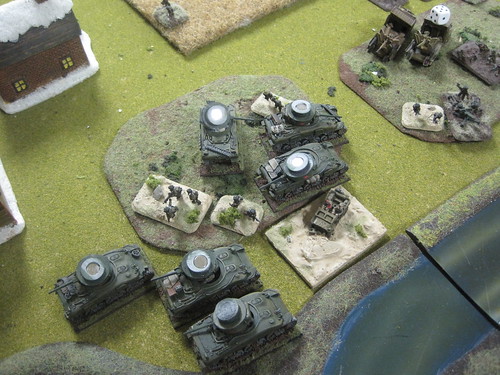
On the left, his infantry assaulted my whittled down, and much abused infantry company, who still managed to thow out enough defensive fire to drive the Ghurkas back in disarray. Finally, the recon platoon my opponent had brought on this turn advanced.
Turn 5: The penultimate, and most savage turn. I was unable to unbog the SU-85, but everything else unpinned. The critical thing now was to take and hold the centre objective. I had to clear out the remaining Ghurkas on the objective, and have enough infantry left over to hold it through my opponent's turn. To begin, I unloaded pretty much everything I had on the Ghurkas, and used my mortars to destroy another gun and pin the artillery platoon. I then threw the infantry into the assault.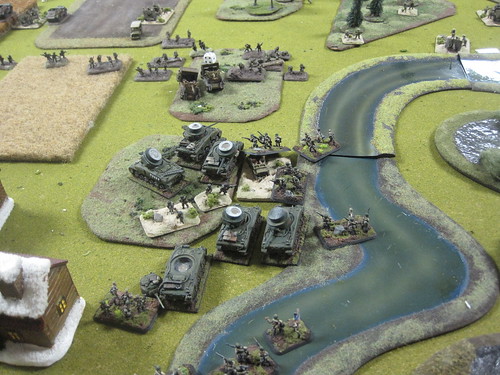
This was a fairly dramatic moment, the infantry coming to grips among the smouldering hulks of the Shermans. I was able to cut down a fair number of teams with shooting, and had overwhelming numbers, so the assault went off well, and I was able to move up and consolidate my position - now I just had to hold it! On the left, I was able to finally pull off another assault.
Between shooting and the assault itself, I destroyed the remnants of the defending platoon on the other objective, and seized it as well.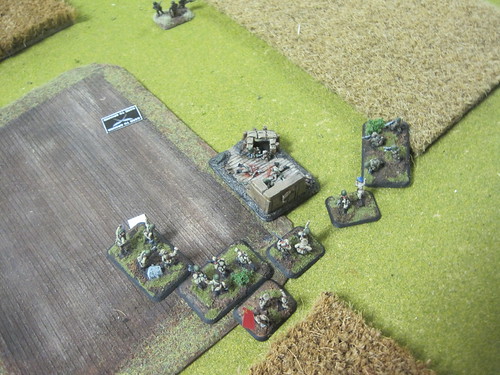
Unfortunatly, I only had a handfull of teams left in that company, and it was unlikely I'd be able to hold it. My thinking was, however, it was one more thing my opponent would have to dedicate resources to, and might draw some fire from the main event on the right.
On my opponent's turn, he moved up the veteran British unit that had come on in reserve. He also advanced his recon unit (armed with multiple machine guns) into assault range on the left. His artillery, unpinned, hammered the infantry defending the righthand objective, while the remaining SU-85s withered under a hail of AT fire.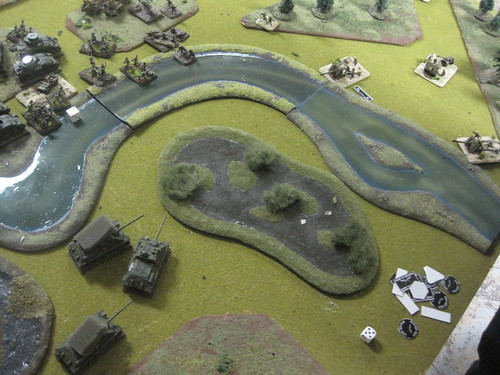
On the left, his recon units unloaded their machine guns into the tattered remnants of my infantry, and destroyed most of them.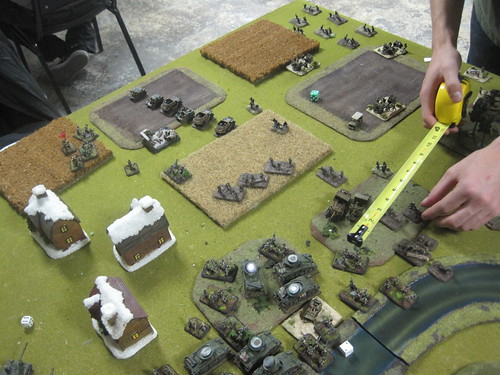
He then threw the recon carriers into an assault with the remnants, and eliminated them to the last stand, including the battalion commander I had attached to the unit. This was bad news, as it meant that if I lost another platoon, I would lose the game.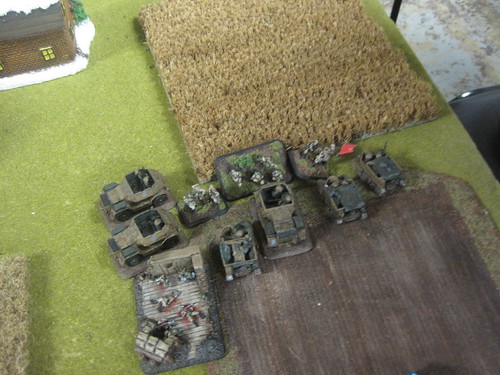
Once below half strength, a force in FoW must roll a morale check to keep fighting. With my commander gone, I would automatically fail the roll, and lose. In the end, it came down to the battle on the right, between the two infantry units. This was a tough fight. The British were veterans, which made them effective combatants, and the British have a special rule that lets them reroll morale checks to counter-attack. On the other hand, I had a lot of Russians, they were fearless, and had their own re-roll capacity in the form of an attached command team (the 2iC) and a Kommisar. This one was a meatgrinder. We went through a good three or four counter-attacks. I started out with something on the order of 15 stands, and lost about 3 stands for every one of my opponents. In the end, however, he broke off, and the remains of my infantry moved to seize the objective.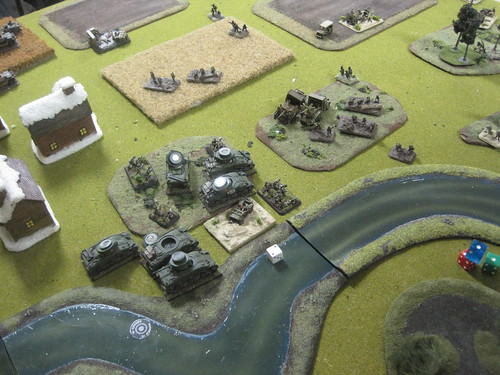
At this point, the game came down to a die roll. My infantry were well below half-strength, which meant they needed to take a morale check. My Kommisar had been killed in the fighting, but my 2iC survived. I had to roll 3+ with a re-roll to keep the platoon in the game. If I did, the platoon would hold, I would start my turn in control of the objective, and win the game. If I failed, my platoon would break, taking me below half strength, and without an overall commander, the remains of the force would break and run, losing me the game. I rolled the dice . . .
. . . and made it.
I had a handful of infantry, my SU-152s, and my mortars. I could just picture the few battered survivers standing, gasping, watching in disbelief as the British withdraw, and hoping that higher command re-enforces them before the next attack comes.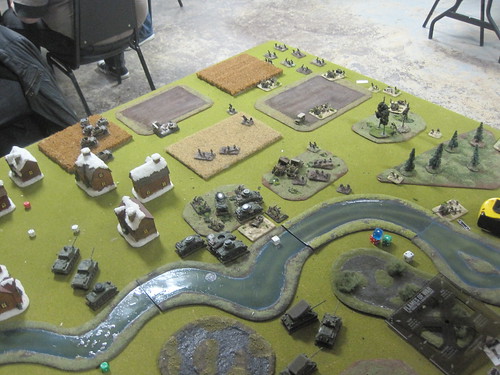
Best game I've had in a long, long time. Mid-war is a very different creature. I've spent some time looking through the book today, and I get the feeling everything is exaggerated. Units are bigger, gutsier, and less effective. Consquently, events are decisive - they happen big, or not at all. I think I might have to paint up some new toys
I have to give thanks and propers to the Toronto Historical Miniature Gamers, a club playing out of the Duelling Grounds. Not only are they unstintingly generous with their terrain, they also made themselves available for rule clarification throughout the game, handy, as both my opponent and I are still learning the finer nuances.
**EDIT**
Just found out that an attached 2iC doesn't give a re-roll like the overall commander does. So, this raises the question, which of the two dice I rolled counts as the first one? Yeesh.
No comments:
Post a Comment