Got in a game on Wednesday night vs. Jack1080 from THMG. The guy who qualified for nationals last year, did pretty good whilst there, and seems to be generally considered one of the more badassish geeks in town when it come to FoW. I figured if I'm going to learn from losing, might as well go up against the best, and he didn't disappoint ;)
Having finished up painting the bits and bobs needed for our upcoming 600p tourney, I wanted to try them out, and so went with Strelkovy for the first time, running the following at 1500 points:
FE Strelk 1500
HQ (add 2 45mm guns)
CC1: 3 Strelk platoons, SMG option, HMG
CC2: 1 Strelk platoon, SMG option, Kommisar, HMG
WC1: Strelkovy Scouts (2 sections)
WC2: 1 platoon 82mm mortars
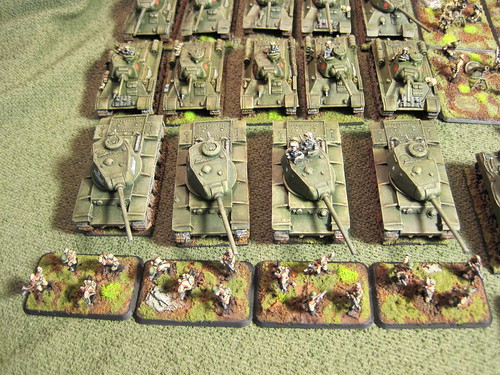
SC1: 4 KV-85
SC2: 5 SU-76
SC3: 1 section flamethrowers
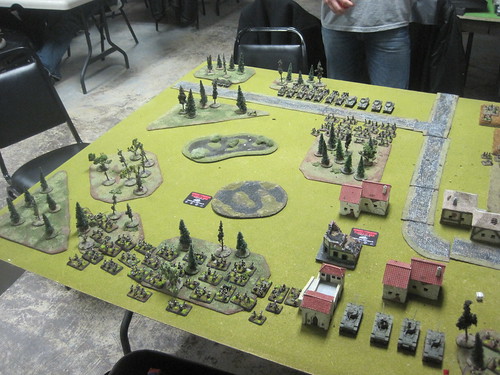
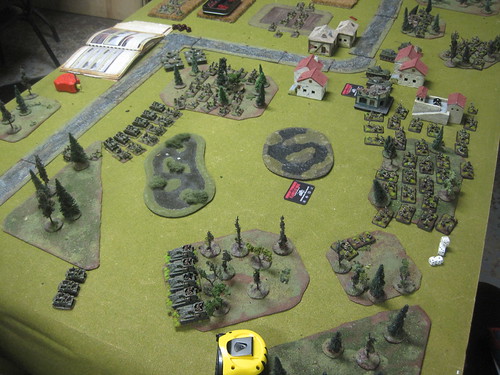
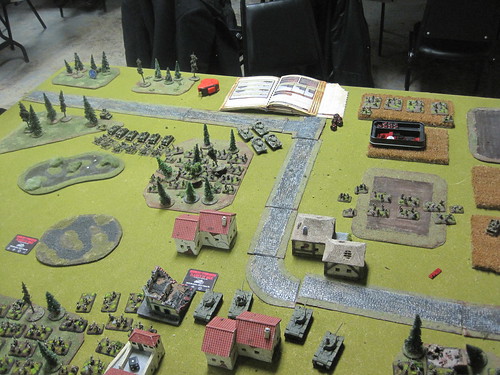
He ran Canadian 3rd with Treleavan, and more carrier patrols than I could shake a stick at. We played fighting withdrawel, and I was defending. Deployment was as below.
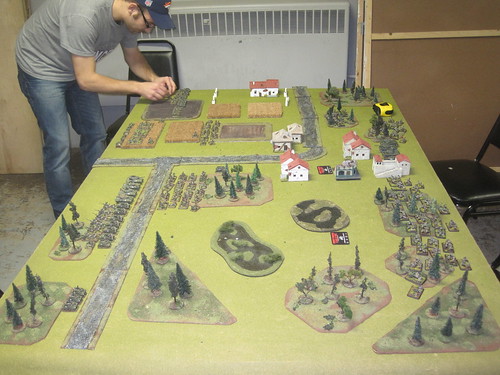
From bottom to top, I have the big strelk company with 45mm ATG and flamethrowers attached, then the mortars, then the KV-85s, then the scouts, backed up by the short strelk company. The SU-76s were in ambush. He had (bottom to top) a carrier patrol, a bunch of 6lbders, some more carriers, a big platoon of infantry, his M-10s, more infantry and carriers, including his HMG carriers and wasps (flame-thrower carriers). He also used the night attack option for the Brits, which allowed him to deploy further forward, and restricts visibility for the first few turns of the game. This is where Learning from Losing began to kick in. In this scenario, three objectives are placed, two by the attacker, one by the defender. Around turn 5, one of the attacker's selections is removed by the defender, but the objective placed BY the defender must stay on. You can see the two placed on the centre and left by my opponent below, while the one I placed was well on my right, in the woods.
What I should have done is put my choice in the centre, along with the big infantry company. This leaves me in a position to cover the objective I have to defend, while letting me move to cover either objective on the flank. In retrospect, I probably should have placed the short infantry company in ambush. If necessary, I could then deploy them as a stopgap, or to backup the main company.
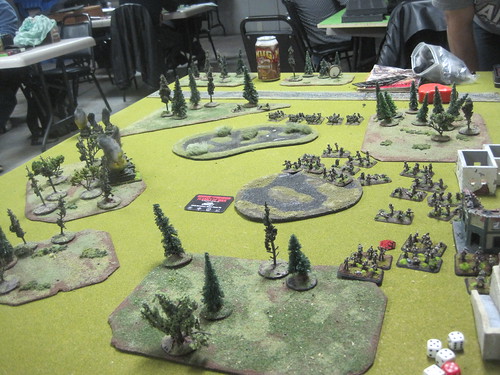
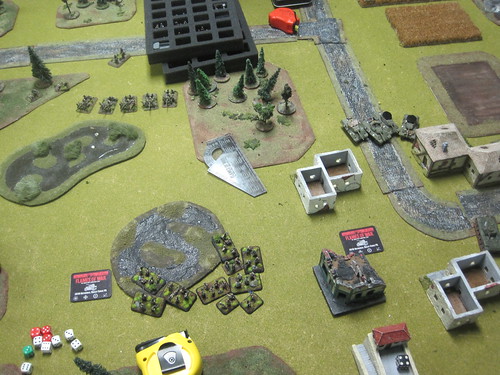
(As an aside, I forgot to take notes for this game, so details might be a little fuzzy) Turn one, he advanced, pushing up his carriers on the flanks, and advanced his infantry into the large forest. His shooting was negated by the limited visibility of the night-attack conditions. I have to admit, I was a little worried by the carriers advancing on my flank. I needed to move my infantry up to defend the objective, which meant the wouldn't be able to dig in the first turn. This would mean the following turn, he could roll up the carriers on the flank, and unload with MGs - a nasty proposition for infantry in the open. To prevent this, I popped my ambush, revealing the SU-76s . . .
. . . and wiping out his carrier patrol.
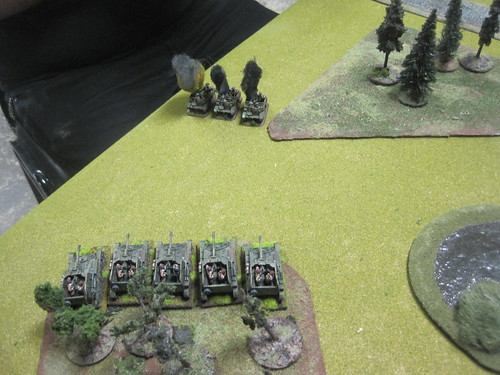
Lessons from Losing pt. II. While the carriers are a threat, three of them could be dealt with by other means. On average, they only would kill 2 stands of infantry a turn - I would have done better to soak the damage, dig in the following turn, and save my ambush for a more critical moment.
In the centre, I moved up my infantry, and slowly pushed the tanks forward, looking to cover both the centre and right objectives.
Lessons from Losing Pt. III. The tanks were KV-85s, which are barely a step down from Tigers in terms of firepower and armour. There was nothing in his army that could reliably damage them beyond the wasp flamethrowers and the M-10s. I was intimidated by the wasp carriers, as they had the potential to chew up my small infantry platoon or the scouts. I used the KVs to take them out. This was, in retrospect, a direct consequence of LfL I above. With the big infantry platoon in a central position, this would have been less of a threat, and I wouldn't have needed to use the tanks against the wasps.
What I should have done with the KVs is ram them down his throat, wiping out the M-10s, which are the only things that could threaten at range, then use the heavy tanks either to back up an infantry assault, or to rampage around his backfield. To some extent, I think failing to do so was related to the switch from armour-heavy to infantry lists. When I take the KVs in a tank-heavy list, their role is to be the scary lurker, while other, cheaper tanks romp around. In THIS list, they need to be my spoiler - they're ultimately a sacrifice unit, and I need to use them to kill stuff and screw up my opponent's plans. As it worked out, I lost them turn 3, to no real purpose.
Turn three was critical. On his turn, my opponent ranged in his 6 lbders, which shot the hell out the SU-76s and my mortars. See LfL II. He shuffled around his carriers on the right, setting up for a combined flame and MG attack on the scouts and short infantry company, and shuffled his M-10s around a bit. He pushed his infantry forward to the central buildings in a bid to attack my tanks, but failed the morale check (infantry must motivate to assault tanks). On my turn, dawn lifted shooting restrictions, and my first withdrawn platoon came off (I pulled the remaining mortars). I knocked out one of his 6lber guns with my 45mms and HMG, and then I tried to assault the infantry he'd placed behind the buildings with my tanks, but after a single round of combat, my (fearless, supposedly) KVs failed to motivate to counter-assault, and ended up parked behind the building.

On his turn 4, he pretty much attacked all over. His M-10s blew away two KVs, his infantry took out a third in assault, his large infantry blob moved out towards my infantry, his 6lbers shot up my infantry blob, his MG carriers did the same to my infantry on the right.
On mine, I pushed my infnatry blob forward, assaulting him, tkaing out two platoons of his infantry . . .

. . . but pretty much decimating my own big infantry blob in the process.
We had to call the game at this point, but frankly, with 8 more turns to go in the scenario, he had the game in the bag. He still had 3 M-10s, most of his 6-lbders, 3 carrier sections, and some infantry kicking around. I had my scouts, and two units of infantry at around platoon strength. There was no way I could cover all three objectives for the next two or three turns, and even if I could, he could easily concentrate enough strength for an assault. So, what did I learn?
First, with the shift to an infantry-based list, deployment and deep understanding of the scenario implications trump manouvre. With a mobile / armoured list, what I do with my stuff in game (especially where I move them) is critical, while where I deploy them is less of an issue (they move, after all). With a relatively static infantry list, where I move is less of a factor (because, really, they're not moving that much most of the time), but where I put them to start (so I have options when / if I move) is critical.
Second, ambushes are one of the defender's most powerful weapons. I lost track of the number of times in this game where being able to pop those SU-76s (or even the rump infantry unit as mentioned above) would have been game changing. Because all weapons no mounted on a turret have firing arcs, being able to pop infantry behind his carriers could have let me totally alter the game. Using the SU-76s to ambush the M-10s would have had the same effect. This doesn't even take into account the mind-games dimension - an opponent is going to be very wary of any area terrain if it could hide an ambushing unit. Using that threat allows a player in a relatively passive role (as defender) to affect the flow of the game.
Third, the role units play has as much to do with how they fit into a list, the demands of the scenario, and what an opponent deploys as what they are in and of themselves. Note my comments on the KV-85s, above.
In a different scenario, or against another list, one with, say, PaK43s or Panthers, the role of the KVs would have been different again. Some of this comes from experience, I'm sure, but I'm going to have to think about this more consciously in-game.
This was a fun game, and one I had to think about. Aside from LfL I-III above, I also learned a few things about list design. My opponent's list had plenty of platoons - he could lose (IIRC) 6 before having to make a break test. However, a fair number of those platoons were soft - 3 carriers, etc. In a tournament game, each lost platoon costs the winner a point (moving from a 6-1 victory baseline to 5-2, 4-3, etc). This means that while it can be durable, it is easy for the list to lose a tournament despite a solid record of wins. I'm also learning about some of the depth of this game - the shift from a mobile tank list to one that relies on static defense, is going a long way toward illustrating what the game has to offer. The same unit can play a radically different role (such as the KV-85s), while the lack of mobility makes deployment a far more significant element (as opposed to in-game manouvre). Jack1080 was a terrific opponent (as always - he's an old Warmachine nemesis), and I look forward to more instructive ass-kicking in the future. Thanks and props again to the Dueling Grounds for the hospitable game environment, and to the THMG for the use of their terrain.
TMtW
No comments:
Post a Comment