Been almost six weeks since my last post. A combination of family, work, and rampaging viral shenanigans put a serious crimp in my painting, and for one reason or another I've not been able to coordinate a game. Things are settling out a little, however, and not only have I been able to put in a bit of work on the 6mm SYW project, but I got in a game of Impetus last night, albeit with JJM's 25mm collection, rather than my 15mm Antigonids.
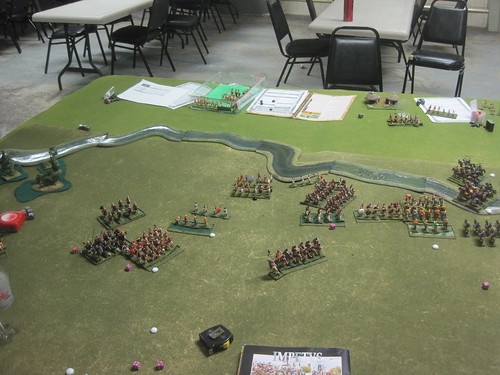
JJM's been pushing for both a campaign and a larger game for a while, so we decided to try the Granicus scenario from the Extra Impetus 4 Alexander campaign. Armies were nominally 450 points, but with free commanders it worked out to the equivalent of 500. We used a big table, 6x8 feet. For a change of pace, I took the Persians, while JJM took the Macedonians.
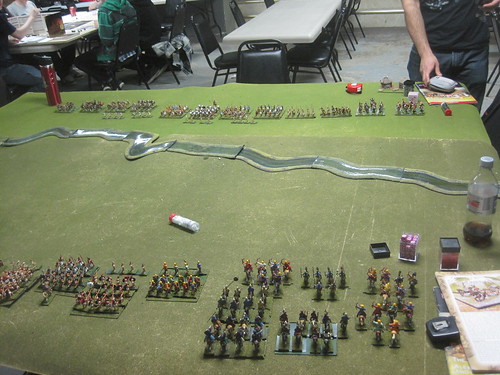
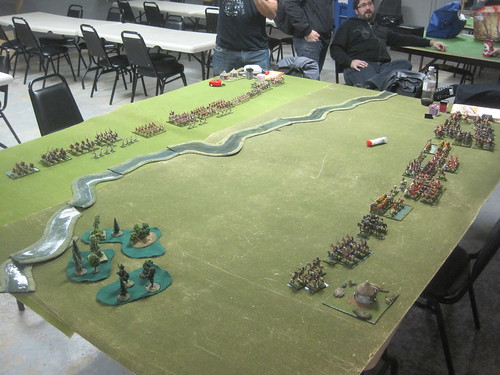
Terrain was set by the scenario, with a river (the Granicus) crossing the table, and a small forested area on my side of the river, on my left. Greek (excuse me, Macedonians) deployed at least 10U from the river (which meandered a bit) while Persian deploy at least 30U from the centre line. Movement in the river was half speed, and automatically disordered anyone crossing it. Persian units had to pass a discipline test in the first turn to activate.
We both had three commands, as it turns out of approximately equal composition. I had a big infantry command under the Greek mercenary commander Memnon, a large cavalry contingent under Bessus, and a small, throwaway command under "Lessus". He had a roughly similar composition, with Alexander himself leading his larger cavalry component, and a slightly smaller "small command" of cavalry.
As Defender, I deployed first, and put my small cavalry command down on my left along with my camp. I knew I'd deploy my infantry in the centre, since they were the least mobile, but I had though about refusing a flank and deploying both cavalry commands on one side. As it turned out, I kind of screwed up my first deployment, and didn't leave room for the big cavalry, which meant that I ended up with a standard "cavalry on the wings" sort of formation. As it turns out, JJM did much the same; since both of us put our stronger cavalry commands on our own right, there was a distinct potential for a corkscrew movement in game. After we had finished, JJM mentioned he probably should have put Alexander and his command opposing my own larger cavalry force, but was a little put off by the horse archer contingent I'd taken (the maximum 4 units, backed by 3 VBU 5 CM).

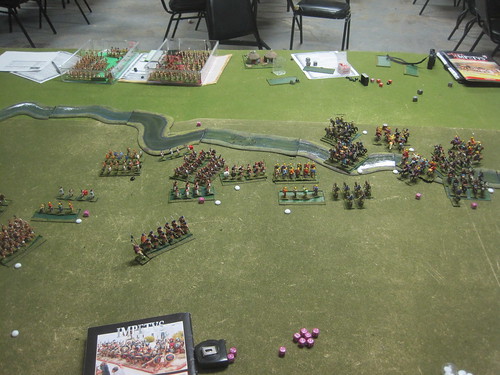
First turn was pretty predictable. JJM pushed his Macedonians forward, but bogged down crossing the river. Out of my entire army, only 3 units passed their discipline test, so the bulk of the army sat there and watched the Macedonians cross the river in peace.
Turn 2 was a little more active, In the centre, his phalanx began the process of crossing the Granicus (moving 5cm a turn, this would take a while).
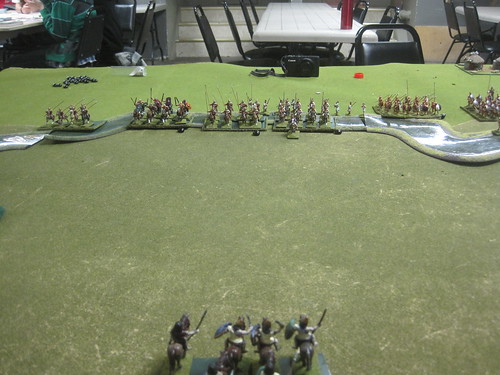
On my left, Alexander and his cavalry got across, but the disruption caused by the river crossing kept them from advancing further. On the right and centre, I threw forward a screen of CL horse archers, skirmishers, and my unit of Indian T, while my heavier stuff plodded forward.

The goal was to hold him on the left, and punch through on the right. I figured if I could get my cavalry behind him, I could begin to fold up his flank.
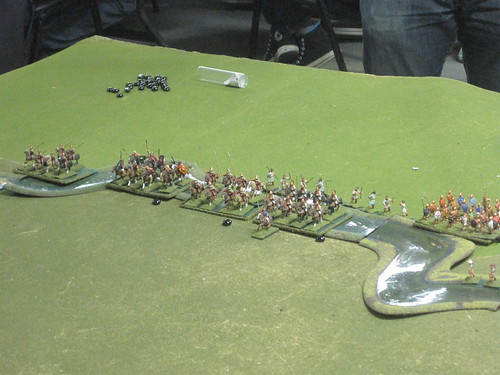
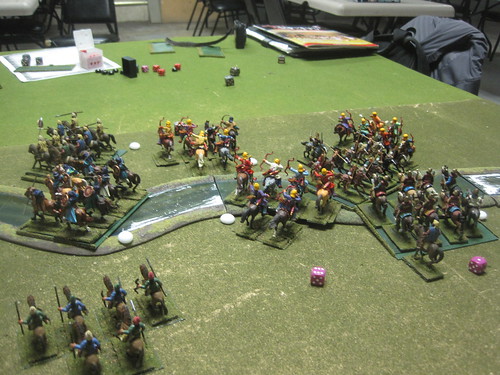
Turn three got interesting. Alexander and his companions, true to history, plunged forward in a reckless charge, actually running down a disordered unit of CL, and forcing a unit of skirmishers to run for the hills. Alexander's presence meant that they were passing discipline tests relatively easily, but the eventually fetched up in front of the CL Takabara that were the hinge between my small cavalry command and my main infantry command in the centre. Things were a little dicey. Although JJM hadn't been able to support the charge with his other cavalry (who were still sorting themselves out post-river crossing), the companions were still a VBU 7 cavalry unit with significant command bonuses, and were in a position to break through and flank my slow-moving infantry. Post-game, JJM seemed to think the move was a mistake. It was a gamble, sure, but honestly, it could go either way.

As it turned out, I managed a flank charge with my CM from the small unit, rolling 9 dice, and got nary a hit.
With subsequent activations, I threw in my Takabara as well, with similar results. This is what I meant about the charge being a legitimate gamble. While JJM caught a break in the first few combats, the basic fact is Alex and the companions are HARD. VBU 7, with an aggregate +2 on cohesion rolls (1 for being in A's command, 1 for having an attached commander), this means you need to do 5 hits before anything other than a 6 on the cohesion roll will do damage. If JJM had managed to untangle the other cavalry in Alexander's command faster, or chewed through the remnants of my small cavalry command a few rounds of combat earlier, I might have been in trouble. As it turned out, I managed to hold off his cavalry, ground Alex and the gang down one VBU at a time, and was able to swing a mercenary phalanx and my Persian guard around to cover the flank. With Alexander gone, his command would struggle with Discipline and disorder the rest of the game, and it bought me the time I needed to attack elsewhere.
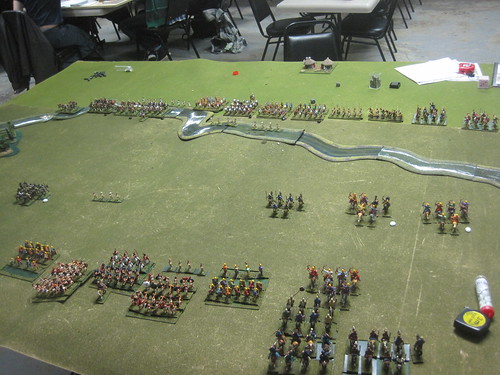
While I fended JJM off on the left, things in the centre and right were going my way. I was able to overwhelm his small cavalry contingent on the far right, eliminating one unit and tying the other up in combat. This left the rest of my cavalry free to push through the resulting gap.
In the centre, I'd managed to push a couple of CL horse archers into position where they could whittle down his infantry as they pushed across the river. While they didn't eliminate any units, they did wear them down, and were able to easily evade once he made it across and tried for contact. This in turn gave my own infantry a significant advantage once the blocks converged, and I was able to maul his infantry core fairly badly.
At this point, things were definitely swinging in my direction, but it still could go either way. His small cavalry command was almost eliminated, while his centre was one unit away from breaking.
Due to some congestion on the left, he'd not been able to bring his cavalry to bear before I was able to redeploy, so that was likely to hold. We debated calling the game at that point, but decided to forge ahead for one more turn.

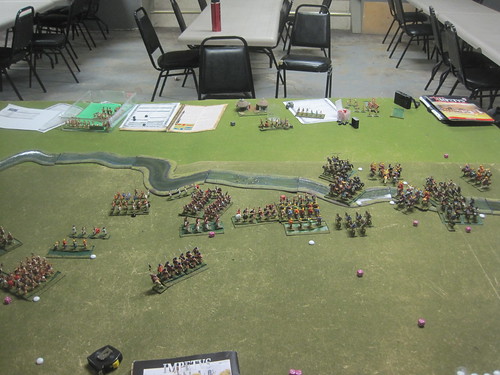
The decisive moments came when the unit of CM on his left went down under a mob of opposing cavalry (to give them credit, they held out far longer than expected).
And in the centre, my phalanx punched through his to relive the hard-pressed Indians.

That broke two of his commands at the end of the turn, leaving him with only the leaderless cavalry command. They presumably opted for the better part of valour. Alexander escaped with his skin, but his march into Asia was stopped at the Granicus. I like to think Memnon escaped the fate of other successful Greek generals at the Persian court, and retired fat and happy, while Alexander spent the rest of his short life brooding on his Oedipal complex before succumbing to a tawdry court intrigue.
It was, to be honest, a terrific game. Visually, it was fantastic. On the big table, the pacing was perfect with the 28mm scale, lots of room to move about. There were some tense moments, especially in the first half when it was an open question as to whether Alexander would turn my flank. The critical moments, however, came when I was able to flood through on the right while he stalled up on the left. It gave me the advantage in the centre, and that's what really decided the game.
I found the Persians actually felt very much like a successor list; very much a combined arms approach. They're distinguished by slightly less durability, but that's compensated by a wider range of options, good light troops, and plenty of medium grade utility. Their slightly cheaper troop options mean they can take lots of decent troops, rather than sinking points into the super-units that seem to characterize the Mac/Succ lists (super-deep pike, super-heavy cavalry, etc.). Given that I have most of what I need to do them in 15mm, I'll likely putter about with a list down the road. Right now, painting priorities are SYW and FoW. I'm scheduled for a game of Might and Reason next week, which should help spur the painting process. Batrep to follow.
FMB
An excellent report, some great looking figures!
ReplyDeleteNice table and report!
ReplyDeleteChristopher
Great looking game- I love 28mm Impetus on a big table!
ReplyDeleteCraig
nice table and good report
ReplyDelete