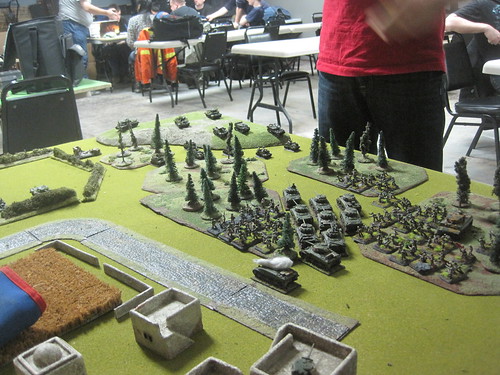
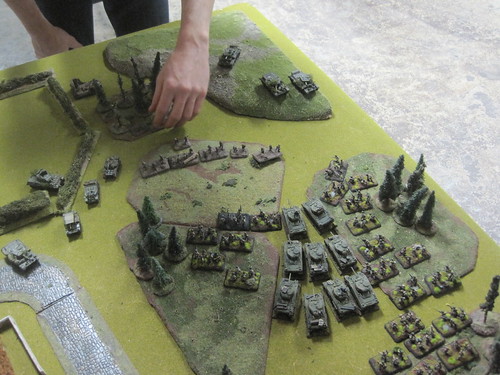
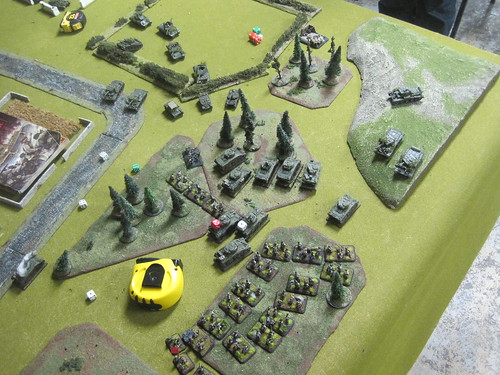
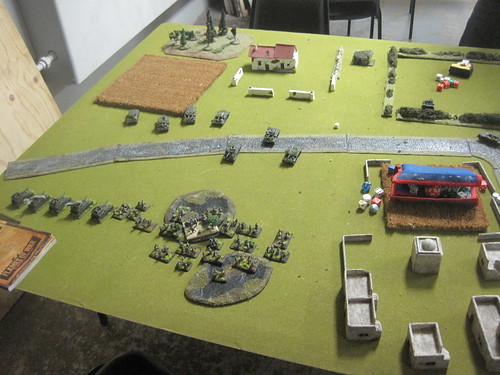
Showing posts with label Lessons from Losing. Show all posts

Thursday, June 7, 2012

Snatching Defeat . . .


. . . from the jaws of victory.  That was the story of last night's heart-breaker of a game vs. that odious petit-Austrian lackey, Nicholas von Lemmingsdorf, aka Nick the Lemming down at the THMG. We were playing the first game of our succession wars campaign, which Nick, as first player, has named the "sausage wars". Don't ask.  No, really.

It all starter out so well.  Set up was as per usual.  We drew Plains for terrain, and Nick ended up winning the scouting roll and choosing to defend.

007

We ended up with a total of six pieces of terrain.  I put a town on my side of the table to cut down on the number of garrisons I'd have to deal with, and a couple of woods.  Nick set himself up a nice littel defensive position of a town and stone wall, and a marsh off on the flank.  As defender, he deployed first, and in depth around the town and wall.  His left, however, was hanging loose, and that's where I figured to attack him.  I put my conscripts on my left, a "column of lines" of my best infantry in the centre, and my cavalry (along with my free mercenary unit as attacker, and my notable, Paul, Duke of Clarkson) on my right.  Guns posed a bit of a problem.  There was no where I could see to put them that they wouldn't be in the way of my eventual attack, so I ended up putting them in the middle, though I was careful to place them so that the infantry could combine into one large force when they moved out.

008

I was rather chuffed at the sight.  I ran the list I outlined in my last post; it is now fully painted, and except for one base of artillery, based.  I still need to do a unit or two of mercenaries, but the end is in sight.  My lovely little French were able to gaze across the table at their petite-Austrian foes.

009

010

011


My plan of attack was pretty straightforward.  Nick's centre was well defended, and the odds of a sudden collapse were slim.  I knew if I attacked frontally, he'd likely end up chewing me up with musketry (he has taken Lethal Volleys as an advantage).  In stead, I figured to use my advantage in cavalry (both quantity and quality) to engage on the right.  I should be able to beat his cavalry wing, and then hopefully bag the "loose infantry" as well.  Even if this didn't break the army, I could at least attack the town from the flank, cutting down on the amount of gunfire to which my troops would be exposed.

I opened the party by alternating an artillery barrage on the infantry acting as "hinge" between the town and his cavalry, and looping my own cavalry out and around the woods on my right.  The artillery barrage didn't do too much, especially given Nick was running "Rally to the Flag" as one of his advantages (making it relatively easy for him to recover disruptions).  It did let me build up my hand of cards however, and gave me something to do while manouevring my cavalry.  On that note, I cannot praise the "Oblique" advantage enough.  At 6 points, it's a steal.

013

At this point, I decided to remember some of the lessons from last game.  It's very easy in Maurice to get sucked in to one part of the battle line, and end up with the bulk of your army sitting and doing nothing.  We were still early in the deck, so I decided to advance the left wing as well.  This would give me some options later in the game, and might divide Nick's attention.

014

I kept up the artillery barrages, so that when my cavalry were in position, I had a mostly full hand of cards, and then sent them in.  I tried to use some of what I've learned about the game so far.  I kept the attacks controlled and limited.  I used my manoeuvre advantage to set up 2:1 fights. The attack unfolded over several turns.  In each stage, I ended up breaking one of his cavalry.

016

021

I tried to pace the attack, so it unfolded over several turns, with pauses to rally between.  My notable, Paul of Clarkson, was incredibly useful for this.  His "instinct" feature is the rally action, which meant that even though my cavalry were now some distance from my commander, I could rally the force cheaply.  I also remembered to retain force coherence, so the whole cavalry wing would activate as one.

020

At one point, this left me in musket range of his infantry, so I pulled back to rally in safety.

022

And then sent part of the force back in again to finish the job.

025

In the process however, my unit to which Paul of Clarkson was attached took some disruption, and then were broken by a combination of musket fire and artillery bombardment.  Although the Duc survived, this was a blow, as it meant it became much more costly to rally the cavalry, something that would have an impact fairly soon.

Nick then made what was probably his best move of the game.  He played the "That's not on the map" card, which is quickly emerging as my most hated element of the game ;)  I've had it played against me with significant effect in two games now.  The impact isn't tremendous, but it does mess with one's timing and momentum, and these are two factors I'm coming to realize are critical in Maurice.

027

The card allows a player to put a smallish piece of difficult terrain pretty much wherever they want.  In Nick's case, it was in the gap my cavalry were about to exploit to get in on the flank of his infantry.  This would mean my cavalry were going to have a significant penalty in combat, more than enough to tip things in favour of Nick.  Redeploying to avoid it took enough time for him to reposition his infantry and guard his flank.   If I was going to break his infantry, it was going to have to be the hard way.

I pulled back my cavalry out of musket range, and took a couple turns to rally them and deploy them so they could attack with maximum effectiveness.

028

I can only assume I got caught up in the game, as I only got a few pictures of the later stages of play.  I sent my cavalry in to attack his flank, getting in on his artillery and infantry.  I managed a two on one on one infantry, but got cocky, and sent my third cavalry in alone against his other infantry unit.  I wiped out both of his artillery, won the two on one, and lost the one-on-one.  This, unfortunately, left my cavalry sitting in front of two units of infantry with Lethal Volleys and Rally to the Flag, which translates as units able to pour in considerable musketry and with an advantage in rallying.  What's more, I had more or less blown my cards in the attack, and simply didn't have the resources to pull the cavalry back out of harms way.  The end result was I lost my cavalry, and two freshly rallied infantry units remained.

029
Smug little sausage-gobblers, aren't they?

This was a gamble, but while the one-on-one fight was a mistake, I don't think the charge was.  Nick was down to a single morale point when the furball was over.  A slight break in either his morale rolls or the combat dice could have settled the game (there was the potential to break his unit in the two-on-one combat).  Losing my cavalry was a blow, no doubt, and I'd rolled a little high for morale losses, but I had four morale points to Nick's one, and another run though of the deck to go.  I could lose another unit safely, and all I had to do was break one more of his units to win.

It was at this point that two mistakes I HAD made came back to haunt me.  First, I'd used the "Death of a Hero" card earlier in the game.  This is an event card that causes damage directly to an opponent's morale.  I should have discarded it from the game, but for some reason, didn't.  Nick used it on me, costing me a morale point.  I'd also had the the "Do you want to live forever card", which gives you bonus morale when played as an event.  I should have done so, and removed it, but instead used it to activate one of the cavalry charges earlier.  Nick now used it, bringing him up to two morale points.  Army morale was now three to two in favour of me.

This crew is still laughing about it.

I advanced my infantry, shaking out my better units into an attack posture on the right.  Nick used the "That's not on the map" card, again, but it had less of an effect this time.  I was careful to keep my units in force coherence, and my conscripts out of musket range (as they have a tendency to melt when up against Lethal Volleys).  On the right it took a couple turns, but I was able to position my guard infantry and one of my trained units so that they'd have a two on one combat versus his.

At this point, I thought I had the game.  With a two on one advantage, and the "A la baionette" advantage", I should be able to win the combat decisively.  I also had a "Grenadiers forward" card, which would give me a bonus in combat.  Somehow, it didn't work out.

It took a couple turns to set up the attack, giving Nick a round or two of shooting while I manoeuvred. My return fire was ineffective, despite playing a card to give me a bonus.  On the turn I attacked, he used a "Fire fight" card to force a volley phase, and again, poured fire into me, enough that one of my two units that were about to attack was pushed past its disruption limit, and was broken.  It cost me two morale points, and now I was down to one.

I'll admit, this took the wind out of my sails.  I still had my guards, though, and decent cards, and there was still a chance to break him.  Moreover, we had at most another three turns worth of cards before "night" and the end of the game.  I figured, what the hell, and threw in my infantry.

I hadn't counted on Nick sitting on a mitt-full of cards.  He played the interrupt "Attack falters" to counteract my attack bonus, played a card that gave him a defensive bonus, and rolled well.  I rolled poorly (and completely forgot the option to reroll I get from "A la baionette").  Net result was this:

030

My guards lost the combat, took two disruption, and broke.  End of game.  I won't deny this one was a heart breaker for me; there was a definite sense of stealing defeat from the jaws of victory.  For the first half of the game, things went really well.  I think the overall plan was good; I can't see how attacking his dug-in, attrition-advantaged infantry in a frontal assault would have worked better.  I think I made a few key mistakes in the game, and while the effect wasn't immediate, it was enough to cost me.

As this was a campaign game, we went through the full after-game process.  There were only limited changes to my army.  While my national advantages protected most of my broken units, one, the 13ieme Royal, went down to conscript status.  One of my conscripts, the Saintonge regiment, was promoted however, leaving things a wash in terms of army quality.  A more significant blow was the loss of the Duc de Clarkesburg.  Although he'd survived the destruction of his unit, it must have had an effect, as he decided to retire from active duty.  This leaves me without any notables in my army.  The loss of the Duc is significant, as it really cuts into my cavalry's ability to operate at a distance.

I hear he's taken up the lute in retirement.

Lessons from losing:

1) Keep your commander forward.  I lost my cavalry because they were too far away to activate; losing my cavalry meant that I had to expose myself to musket fire from troops with a significant advantage in that phase, and lost me my advantage in mobility.  If my commander had been closer, I would have been able to either march them back out of danger, or rally them.  I think I got cocky because I'd had a handful of high-span cards early on, but then ended up drawing nothing but fours when I really needed them.

2) Use your whole army.  I'm getting better at this, but I still should have brought up my infantry sooner.  I sent the cavalry in against Nick's artillery and infantry without any support.  This was a mistake.  The formation I attacked wasn't going anywhere.  Bringing up the infantry would have given my commander cover from any opportunistic advances from Nick (making lesson 1 a safe option), and would have forced him to split his musketry when the attack went in.  Instead, I gambled on breaking his line, and lost.

3) Use the event cards.  I made a point of trying to build, and keep, a good hand this game.  This is necessary, but I think I did it at the expense of a couple of advantageous plays.  I've noticed a tendency to try and time the use of these cards for dramatic effect - saving "Death of a hero" for when my opponent is down to only a few morale.  I won't do this again.  Card that give an advantage and can be removed (thus eliminating the chance of offering your opponent the same advantage) will be used promptly, and discarded.  Not doing this made for a two-point margin in this game, i.e., it cost me the win.

4)  Remember the macro-game.  We are playing a campaign now.  When Nick shot up one of my two "attacking" infantry, there were at most three turns left in the game.  In a one-on-one infantry duel, although my unit should have the advantage, the likelihood of a decisive outcome (i.e., doubling his score and breaking him) was slim.  I could have pulled back, rallied, and taken the minor loss (for failing to capture the objective) instead of the major.  This would have reduced both Nick's haul of epic points, and reduced the points that went to the opposing faction (of petty germanic sausage-gobblers). As it turns out, while there's still one battle to be fought in this series (between my Bourbon brothers of Spain and the Anglo-Hanoverians), the outcome of the battle won't affect this round of the campaign - we've already lost badly enough that our side will sue for peace.  While it was theoretically possible to break his unit, the odds were long.  I need to shift my thinking to long-term objectives, especially in the end game.

I'd ask myself "What would Louis do?", but he'd just quote the Notorious B.I.G. at me.

For those of you interested in the Austrian take on things, you can go here, though I can't recommend it.  Read at your own risk ;)

I really have to applaud Sam Mustafa. This game has captured my imagination.  The game last night wasn't over a minute before I started breaking it down, looking for what went right and wrong, where I could correct mistakes, and generally scheming.  I've spent an inordinate amount of time over the last several weeks just thinking through the game.  Every time I play, I discover some new dimension of depth, something new of which to take account, some new factor to consider in terms of play and how I use my army.  Despite all this sort of cerebration, the game is just fun.  Lose, win, doesn't matter, I enjoy the game.  For those of you out there on the fence, I can't recommend it enough.

I should have a painting post up for Sunday.  Next week I won't be able to get a game in (work is interfering, I'm afraid), but will hopefully have some sort of alternate content.  My regular schedule of posts should resume in about two weeks, after the 20th.

FMB


Thursday, May 24, 2012

The best laid plans . . .

Hi,

Got in my second game of Maurice last night, and while it was a bit more cagey than the first, has had me chewing over things ever since. Pretty sure I dreamed about troop deployment last night ;)

I've found my reaction to the game has radically shifted since last night. I keep realizing more things I could / should have done differently. Definitely one for the "Lessons from Losing" files. I ran a slightly modified list, upgrading my Dragoons to trained, and taking Depot Battalions, Oblique, and Cavaliers for my national advantages. Otherwise, the list was the same as the one I ran last week. As per usual, the game started by drawing a terrain card. As it happens, I'd been discussing with the guys playing at the next table whether or not to pull the urban card from the deck (we were playing intro games with two new players, and towns add a level of complexity), but forgot to do so. Guess which card was pulled?

 021

 As it turned out, it was a non-issue. No one deployed in a town the whole game ;) Next, we pulled our notables. I got this fine old fellow:

  023

And spent the rest of the game enjoying his name immensely. Seriously, try it with me "Aug-ooostoos Vfon Tees-LING! It's just fun. As it turns out, the guy is actually pretty handy, though I don't think I made the best use of him. My esteemed opponent, marke, pulled this one:

  024

 He promptly attached him to one of his better infantry units, which already were buffed with the national advantages Steady Lads and Lethal Volleys. Huzzah. Marke won the scouting roll, and elected to defend. The objective was placed on a central hill, and I opted for an extra cavalry unit. Deployment was fairly straightforward. I'd managed to keep the majority of the towns on my side, and deployed infantry and guns in depth in the centre, cavalry on the wings, with the greater share on my left in column for rapid movement. I had initially thought about refusing the left and massing cavalry on the right, but the town you can see in the top right of the picture had be a bit worried. Regular cavalry can attack towns, and the prospect of being bottled up between the town and board edge, and then shot up by infantry had me a tad worried.

 025

The opening stages of the game were fairly straightforward. I began with a general advance in the centre, trying to leave my guns with a clear line of fire. Artillery is still something I'm getting used to using in this game. In both of the games I've played, they've really only had a couple of opportunities to fire, partly because doing so at range is a separate activation, partly because of where I deployed them. When to use them, I think, is still a bit of an open question, especially on attack, but where to put them I think I'm getting a handle on.

 027

On attack, I think artillery needs to be a "hinge" between your "holding" units and your attacking units. That way, their lines of fire remain open, and whenever you need to pause and build up some cards, you can toss out bombards. My next move was to push the cavalry in column forward on the left.

 028

Marke responded by moving his infantry up to threaten them, and I shifted into massed formation. He got in a partial volley on the next phase, doing some minor disruption to my dragoons.

 029

We fussed about a bit, and then I pushed the cavalry back around the woods.

  031

Still not sure if this was a mistake. Despite marke playing a captured intelligence card (which lets him steal one of my), I had two clear instruction cards in my hand, which let me activate a force at any distance. I ended up using them to push the cavalry around and behind the woods. Instead, I probably should have just gone straight through. I would have taken disruption, but with Augustus attached, I could have rallied, and would have thrown his entire flank into disarray.

 031

It was at this point that things started to come apart a little. I was short on cards, so couldn't really push my "end run" on the left. I was taking damage from volleys, and though my counter-fire was beating the odds, my forces weren't as cohesive as marke's, which made frontal assaults chancy. I did manage a good play with the Heat of Battle card, pulling one of marke's infantry into a two on one that destroyed it.

 032

 When I had a chance, I tried to hammer in my infantry . . .

 034

 . . . using a "For the King" card to offset my disruptions.

 035

 Marke countered with an attack falters, causing one of my units not to charge. This, combined with iffy attack rolls, combined with marke's use of his "Steady lads" reroll (IIRC), made the combat far less decisive than I'd hoped.

 036

Instead of wiping him out, my units recoiled, interpenetrated, and with the accumulated disruptions, wiped each other out.

 037

At this point, things hadn't gone the way I'd hoped, but the game was far from over. Marke began to push forward on my right, in a bid to wrap around my flank and (I assume) pour some fire into me.

 038

I used my mobility (hooray for oblique) to shift my lines a little. In retrospect, I should have dressed them a little more, or even pulled back a bit. Even though I was able to keep real gaps from opening up, my infantry was still too dispersed to act as a single force.

 039

On the left, I activated my cavalry, pushing two units around the woods, and bringing the dragoons down to threaten Marke's flank. He used a card (Confusion)to make my dragoons march out of position, buying himself time to redress his lines and cover his flank.

 041

040

In the centre and on the right, things stagnated into a musketry duel. Outnumbered and outgunned, I knew I'd lose this over time, but hoped I could hold out long enough to change the balance with my cavalry. You can see them in the top left, having cleared the woods, and facing down marke's.

 041

It was at this point I made an inexcusable error. Marke played the "That's not on the map" card, which let him place a small piece of rough ground anywhere not occupied by a unit. He put it right between our cavalry forces. I knew that moving through it would case disruption, but I forgot about the hefty penalty regular units take in combat when fighting in rough ground. This shifted a combat that I should have won (even with a few disruptions), and might win decisively with a bit of luck, into one that pretty much shattered me.

 043

My cavalry had now taken disruption from moving through the difficult ground, from combat, and from moving through the ground again with the involuntary fall back move. I managed to rally some of the damage, but things were looking grim.

 044

Because my cavalry were so far away, it took a few turns for them to pull out, rally again, and redeploy. I moved one to the outside, hoping to bypass marke's cavalry, while the other charged down, into the rear of his infantry. That charge should have gutted him, but again, his steady lads reroll came into play, I rolled poorly, and my dragoons recoiled. Marke turned his infantry around, and when I chanced another charge, he bounced and destroyed by poor dragoons.

 045

I lost another unit to musketry, and that was the game.

At the time, I was pretty flummoxed. Other than forgetting the rough ground penalty, it didn't seem like I had made any glaring mistakes. Marke had used his cards well, slowing or blocking key charges, and relying on his musketry to to the work.  Dice were mixed.  Although my volley rolls had been above average, I'd had poor rolls on key attacks, and mediocre to poor rolls on key rallies.

Despite this, half my army was destroyed (in a campaign game, my army quality would be drastically reduced), but there was nothing I could point to to explain what had gone wrong (even the rough going charge wasn't a game-breaker.  With a little distance, however, I'm seeing things a bit differently.

So, lessons from losing:

1)  Don't limit your own opportunities.  Some of what went wrong was self-inflicted, mind games. For whatever reason, it never occurred to me to just drive my cavalry through the woods on the left. While there's no guarantee that would work, it would have placed three cavalry units, one elite, in the middle of his flank, and would certainly have shaken up his ability to coordinate.  With a bit of luck, I might have gotten in some flank charges.

2)  Be aggressive, not desperate.  When the game ended (i.e., when my morale broke), we still had a full deck to go through (i.e., about a third of the game to play). I could have been more measured and coordinated in my attack. I find I build up a real sense of urgency, especially once I close to 4 base widths, the distance in which musketry occurs and infantry can charge.  I get to feeling like if I don't do something now, my army will be shot apart piecemeal.  While there's a little bit of truth to that, in retrospect, there's nothing wrong with hanging back, and using rally or bombard actions to build up a hand slowly, looking for the right cards to coordinate an attack.

3)  Coordinate means consolidate. Being able to efficiently rally troops means actually maintaining a coherent force.  This is important in defence, but critical in the attack. Splitting my infantry to leave fire lanes for the artillery was a mistake, especially since I never ended up firing my guns (there always seemed to be something more important to do). Putting them off to the side, on one flank or another, would give them a chance to fire when the opportunity arose, leaving my infantry able to act more cohesively.

4)  There's more than one way to win / worry about winning, not losing.  The last real mistake I can see, in retrospect, was attacking with my cavalry once he'd placed his patch of rough going. Aside from the obvious (avoid fighting in the rough with regulars), what I should have done is bypassed his cavalry force, and made a run for the objective. He could certainly have turned around and chased, but he couldn't catch me until I had control of it. Once I did, he'd be in the position of having to try and attack me, which in the worst case, would have compromised his ability to hold off my infantry, and thrown his lines into confusion. I got so caught up in the pressure on my own morale (seeing the game as a race to break him before he broke me) that I lost track of the alternate way to win, i.e., take and hold the objective.

Lessons learned. Not sure what I'm doing next week. There was some talk of an introductory game of blood bowl, but tbh, this game got my dander up, and I'd like another shot at Maurice. I should have a painting post for Sunday. See you then.

FMB
Thursday, January 13, 2011

PBI

HI,

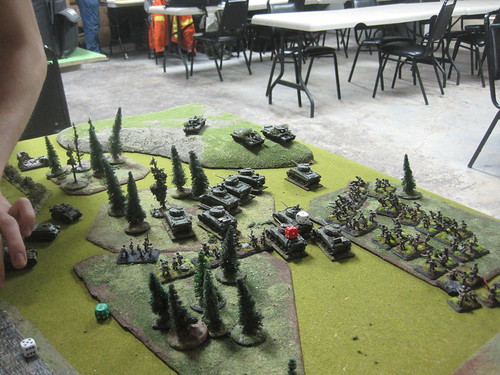
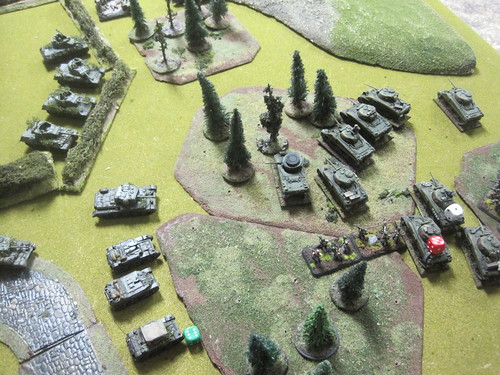
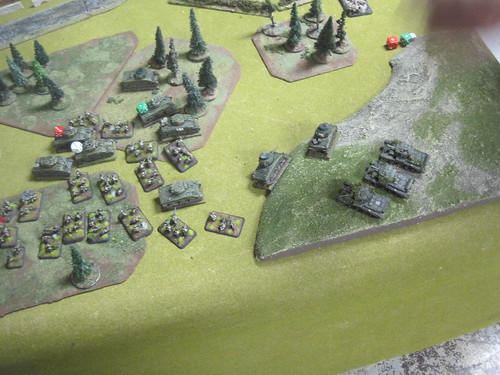
Got in a game against the Sodbuster last night (my opponent from the nail-biter a few weeks back), and got beat, straight up. We played a 1500 point LW game, his Brit tanks (cromwell list) vs. a slightly modified version of the list I ran vs. Jack1080 (I swapped the 4 KVs for 10 Emcha). I'm still trying to put my finger on what I did to lose (aside from failing a couple of critical morale checks, one of them three times). I suspect I had things screwed up from deployment; apparantly, learning what I did wrong isn't the same as learning to do it right ;) Here's the AAR.


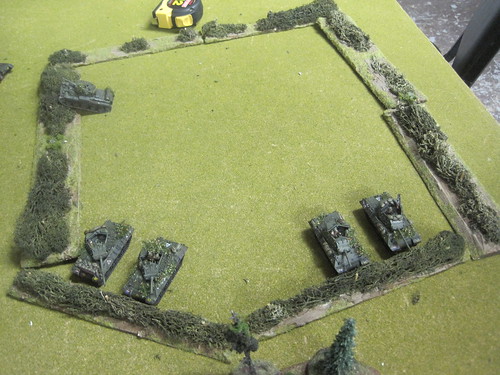
Set-up: The table was fairly flat. Although I had a nice stretch of woods on my right, around 2/3 of the table was open. While I know this would give direct / tank fire an advantage, it's also something I know I need to learn to deal with. The scenario was Free for All, which is essentially a meeting engagement. Sodbuster had choice of table edge, and was nominally the attacker. He set up his objectives on my side, with one on each of the outside third of the table. I put my objectives on the centre and the right, and we deployed.

005

I had:

HQ (add 2 45mm guns)
CC1: 3 Strelk platoons, SMG option,HMG
CC2: 1 Strelk platoon, SMG option, Kommisar, HMG
WC1: Strelkovy Scouts (2 sections)
WC2: 1 platoon 82mm mortars
SC1: 10 M4s
SC2: 5 SU-76
SC3: 1 section flamethrowers

He brought several platoons of cromwells (I think I remember 3), some transport infantry in UCs, a platoon of Stuart Jalopies, and a platoon of tank destroyers. He also attached his 2iC to a couple of those howitzer cromwells as another platoon.

His deployment was fairly distributed, which gave him some choices in-game. His tanks were Cromwells, which have the same stat line as my Emcha Shermans, but with faster movement, and a re-roll to un-bail. Because his tanks are so fast (their Light Tank designation means they can move up to 16" and still shoot), the broad frontage gave him the option to concentrate pretty much wherever he wanted. I suspect that deployment for Soviet infantry is going to be a bit of a learning curve. While it is critical, there's so much stuff ot put down that I often feel rushed, and unable to take the time to figure things out. I suspect this will get better with time as I become more familiar with the list and how to use it.

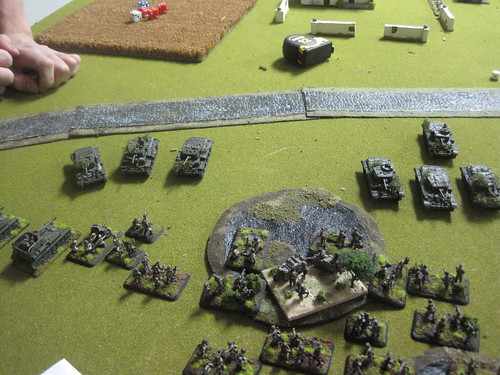
On the left, I put my SU-76s , followed by the veteran scouts, supported by the short mortar platoon and the small infantry company with attached 45mm guns.

006

On the right I had this:

007

That's the Shermans, plus the 3 platoon infantry company, with flamethrowers attached. Guess from which side I planned to attack? While in retrospect, I would have done better not to try and attack against tanks, I thought I would try to use the woods on the right to advance the infantry, using the tanks to screen, and with the flamethrowers as a back-up plan for taking on any tanks the Shermans couldn't deal with. Seemed like a good idea at the time.

My oponent won first turn, and proceeded to take advantage of the fact that my troops didn't start dug in by killing them. He destroyed an SU-76, bailed 2, took out a 45mm gun and the HMG on the left (his fire prioritized the guns), and a Sherman. Digging in would be a priority on my turn, and my troops responded well. The infantry and scouts on the left dug in, while the Su-76s (those that managed to unbail) fired at the cromwells to no effect.

011

On the right, my attacking platoons trundled forward, trying to stay in the cover of the trees.

010

Turn two, Sodbuster swung most of his armour to the (my) right. I think he found the blob-o-doom a little threatening. I can't imagine why ;) He finished off the S-76s, and directed the rest of his fire at the dug in infantry, killing 1 stand. He also unloaded his infnatry from their transports, and tried to position them in such a way as to avoid assault. Unsuccessfully ;)

On my turn 2, while the infantry on the left hunkered down in their foxholes, I attacked on the right. I moved my big infantry company up leaving room for the tanks to follow up, pinned his infantry, and assaulted. Because the infantry comany is so big, and because the terrain was constricting, (and to give SB his due, he did go out of his way to avoid contact) I only managed to get a few stands in contact for the first round of the assault. Now, ordinarily, this wouldn't be an issue. I have plenty of stands, I get to repeat my 4" assault move in each round, and with athe CiC and Kommisar, I get three chances to make the motivation roll. I mean, what are the odds of failing three 4+ rolls? 7 to 1, right?

012

See that picture? That's what it looked like on the right when your infantry pull the long odds. I failed to motivate, and my infantry retired. In hindsight, I think this was probably the pivotal moment in the game. If my infantry had assaulted for a second round, they would have cleared the way to the objective next turn. With my flamethrowers and shermans, and his tanks isolated from each other, I could have moved to assault the objective on the following turn. While I would have lost stands to MG fire, he would have stuggled to keep me back. At minimum, it would have put the fight onto his side of the table.

With my infantry sitting around drinking vodka and enjoying the apopleptic antics of the batallion kommisar, however, it fell to the Emchas to seal the deal, which they did.

013

This wasn't a bad thing by any means, but the results were significant. You see the tanks with dice on them? Tanks + forest = bogged. Bogged + exposed to enemy fire = dead tanks. Bogged tanks also slow down the attack as a whole, and given the speed of Sobusters forces, slow = dead.

From Turn 3 onwards, things weren't inevitable, but they were predictable. On the left, his cromwells moved up, and began to soften up the infantry, eventually taking out the remaining 45mm gun, which was the only thing that could realistically threaten him in an assault (I'm growing to love these guys - they are small but mighty).

017

On the right, he swished around the table to get some nice firing lanes, and proceeded to shoot the hell out of me.

015

His jalopies took out the stands hiding along the fringe of the woods (stupid mistake of the game - leaving one of my two precious flamethrower stands on the edge of the woods). His Cromwells also took out a Sherman.

016

On my turn, my tank crews bravely declined to either unbog or remount, and the few tanks I had functioning moved out and fired, managing to bail two of his tanks.

021

My infantry nudged forward, but it kind felt like a light brigade moment - MGs to the left of them, MGs to the right of them, MGs to the fore. The clear road to the objective I had hoped for on turn 2 was rapidly receeding.

Turn four was the final turn. On his turn, he assaulted on the left, killing teh mortars and some infantry, and driving the rest off the objective. I tried to motivate to counter assault, and failed. Kommissar tried to "motivate". And failed. Stupid Kommisar.

020

While I was able to move back on to contest the object on the bottom of the turn, the left was going to be, at best, a stalemate for me. With a bit of luck, I could keep him from claiming it, but I lacked the resources to drive him off / destroy him.

On the right, his tank destroyers had line of sight to the tanks I'd moved up to shoot. They used it, and destroyed the Shermans in a position to do anything usefull.

021

With three of my tanks bailed or bogged, this took me below half strength on the M4 company, which promptly failed a morale check, and ran. I really want to hate those TDs, but it's hard, 'cause they're so pretty:

022

023

What is it with me and tank destroyers? The FoW boards are full of people grumbling about how useless they are, but the shoot the hell out me every time I play against them.

It was getting late, so I conceded on my turn 4. Ordinarily, I dislike doing this, but to be honest, had we had the time to play the last couple of turns, he would have won. With no AT assets left to speak of (1 flamethrower stand, with luck, meant one successful assault against one armoured platoon), I probably could contest my objectives until time ran out, but there was no way I was going to take his. He was ahead on platoon kills, and even without the objective, would win when time ran out. In fact, all he had to do to win was pull back to defend his objective.

It was a good game. In retrospect, a heartbreaker, but at the time, I didn't realize how critical that failed infantry motivation roll in turn 2 was. Lessons form Losing PT. IV: When attacking, infantry must keep moving. Losing momentum means losing the game.

Lessons from Losing Pt. V: There's more than one way to win. Having lost momentum on the right, what I probably should have done is dig in. There's no way he would have chewed through that much infantry once they were in foxholes, and I could bring my tanks back and around to snipe his units. While that meant giving up on an objective win, I could have tried for a win by points or forcing his company to break.

Once again, Sodbuster was a terrific opponent. He used strengths of his army and the terrain well, and earned himself a solid win. Thanks to the Dueling Grounds for the playing space, and to the THMG for terrain.

TMtW