Got in a game against the Sodbuster last night (my opponent from the nail-biter a few weeks back), and got beat, straight up. We played a 1500 point LW game, his Brit tanks (cromwell list) vs. a slightly modified version of the list I ran vs. Jack1080 (I swapped the 4 KVs for 10 Emcha). I'm still trying to put my finger on what I did to lose (aside from failing a couple of critical morale checks, one of them three times). I suspect I had things screwed up from deployment; apparantly, learning what I did wrong isn't the same as learning to do it right ;) Here's the AAR.
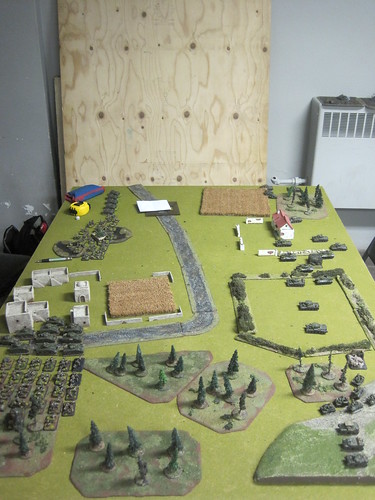
Set-up: The table was fairly flat. Although I had a nice stretch of woods on my right, around 2/3 of the table was open. While I know this would give direct / tank fire an advantage, it's also something I know I need to learn to deal with. The scenario was Free for All, which is essentially a meeting engagement. Sodbuster had choice of table edge, and was nominally the attacker. He set up his objectives on my side, with one on each of the outside third of the table. I put my objectives on the centre and the right, and we deployed.
I had:
HQ (add 2 45mm guns)
CC1: 3 Strelk platoons, SMG option,HMG
CC2: 1 Strelk platoon, SMG option, Kommisar, HMG
WC1: Strelkovy Scouts (2 sections)
WC2: 1 platoon 82mm mortars
SC1: 10 M4s
SC2: 5 SU-76
SC3: 1 section flamethrowers
He brought several platoons of cromwells (I think I remember 3), some transport infantry in UCs, a platoon of Stuart Jalopies, and a platoon of tank destroyers. He also attached his 2iC to a couple of those howitzer cromwells as another platoon.
His deployment was fairly distributed, which gave him some choices in-game. His tanks were Cromwells, which have the same stat line as my Emcha Shermans, but with faster movement, and a re-roll to un-bail. Because his tanks are so fast (their Light Tank designation means they can move up to 16" and still shoot), the broad frontage gave him the option to concentrate pretty much wherever he wanted. I suspect that deployment for Soviet infantry is going to be a bit of a learning curve. While it is critical, there's so much stuff ot put down that I often feel rushed, and unable to take the time to figure things out. I suspect this will get better with time as I become more familiar with the list and how to use it.
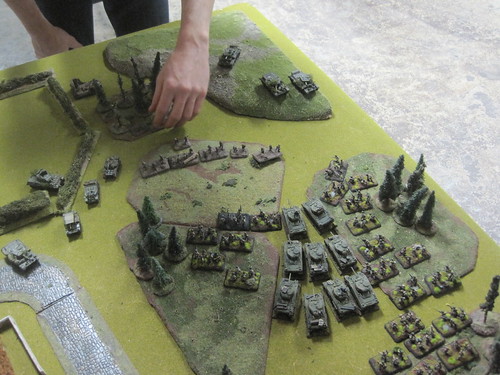
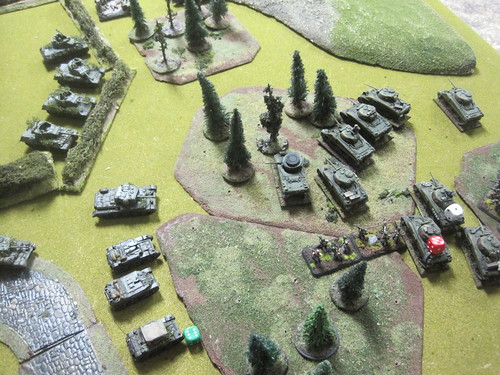
On the left, I put my SU-76s , followed by the veteran scouts, supported by the short mortar platoon and the small infantry company with attached 45mm guns.
On the right I had this:
That's the Shermans, plus the 3 platoon infantry company, with flamethrowers attached. Guess from which side I planned to attack? While in retrospect, I would have done better not to try and attack against tanks, I thought I would try to use the woods on the right to advance the infantry, using the tanks to screen, and with the flamethrowers as a back-up plan for taking on any tanks the Shermans couldn't deal with. Seemed like a good idea at the time.
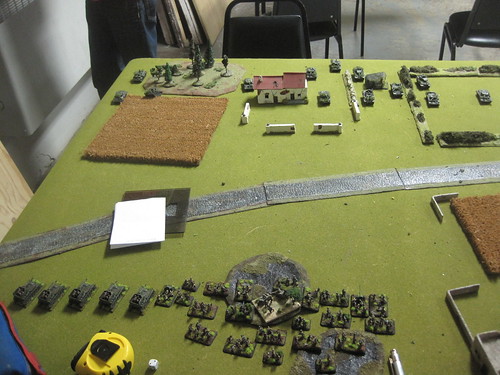
My oponent won first turn, and proceeded to take advantage of the fact that my troops didn't start dug in by killing them. He destroyed an SU-76, bailed 2, took out a 45mm gun and the HMG on the left (his fire prioritized the guns), and a Sherman. Digging in would be a priority on my turn, and my troops responded well. The infantry and scouts on the left dug in, while the Su-76s (those that managed to unbail) fired at the cromwells to no effect.
On the right, my attacking platoons trundled forward, trying to stay in the cover of the trees.

Turn two, Sodbuster swung most of his armour to the (my) right. I think he found the blob-o-doom a little threatening. I can't imagine why ;) He finished off the S-76s, and directed the rest of his fire at the dug in infantry, killing 1 stand. He also unloaded his infnatry from their transports, and tried to position them in such a way as to avoid assault. Unsuccessfully ;)
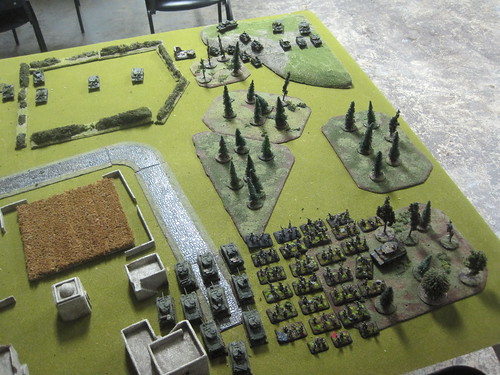
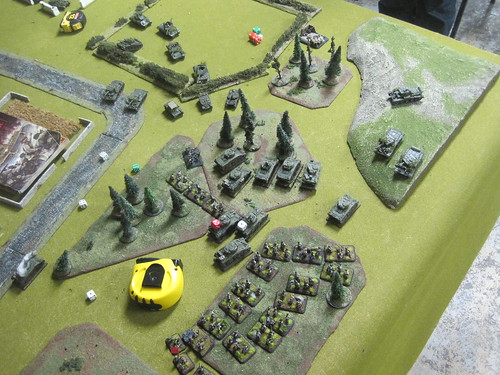
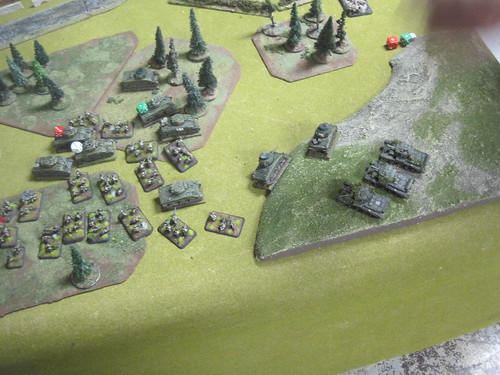
On my turn 2, while the infantry on the left hunkered down in their foxholes, I attacked on the right. I moved my big infantry company up leaving room for the tanks to follow up, pinned his infantry, and assaulted. Because the infantry comany is so big, and because the terrain was constricting, (and to give SB his due, he did go out of his way to avoid contact) I only managed to get a few stands in contact for the first round of the assault. Now, ordinarily, this wouldn't be an issue. I have plenty of stands, I get to repeat my 4" assault move in each round, and with athe CiC and Kommisar, I get three chances to make the motivation roll. I mean, what are the odds of failing three 4+ rolls? 7 to 1, right?
See that picture? That's what it looked like on the right when your infantry pull the long odds. I failed to motivate, and my infantry retired. In hindsight, I think this was probably the pivotal moment in the game. If my infantry had assaulted for a second round, they would have cleared the way to the objective next turn. With my flamethrowers and shermans, and his tanks isolated from each other, I could have moved to assault the objective on the following turn. While I would have lost stands to MG fire, he would have stuggled to keep me back. At minimum, it would have put the fight onto his side of the table.
With my infantry sitting around drinking vodka and enjoying the apopleptic antics of the batallion kommisar, however, it fell to the Emchas to seal the deal, which they did.
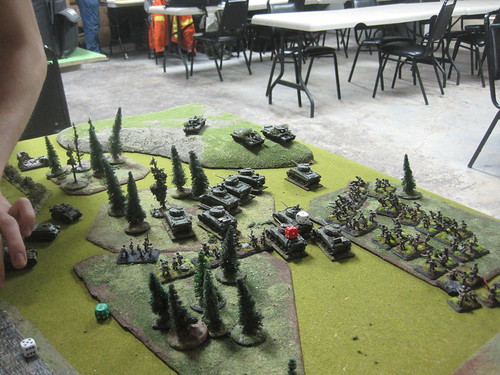
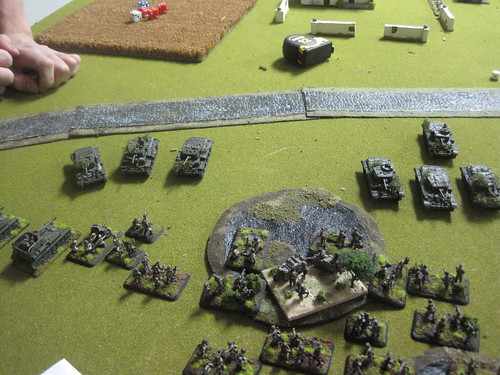
This wasn't a bad thing by any means, but the results were significant. You see the tanks with dice on them? Tanks + forest = bogged. Bogged + exposed to enemy fire = dead tanks. Bogged tanks also slow down the attack as a whole, and given the speed of Sobusters forces, slow = dead.
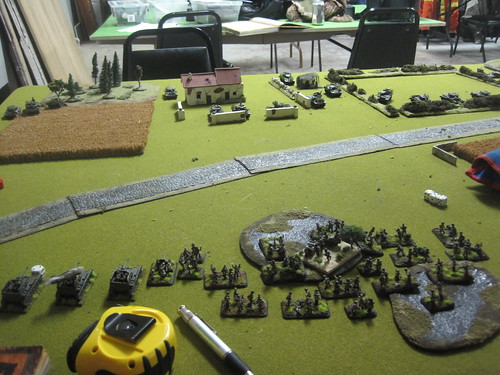
From Turn 3 onwards, things weren't inevitable, but they were predictable. On the left, his cromwells moved up, and began to soften up the infantry, eventually taking out the remaining 45mm gun, which was the only thing that could realistically threaten him in an assault (I'm growing to love these guys - they are small but mighty).
On the right, he swished around the table to get some nice firing lanes, and proceeded to shoot the hell out of me.
His jalopies took out the stands hiding along the fringe of the woods (stupid mistake of the game - leaving one of my two precious flamethrower stands on the edge of the woods). His Cromwells also took out a Sherman.
On my turn, my tank crews bravely declined to either unbog or remount, and the few tanks I had functioning moved out and fired, managing to bail two of his tanks.
My infantry nudged forward, but it kind felt like a light brigade moment - MGs to the left of them, MGs to the right of them, MGs to the fore. The clear road to the objective I had hoped for on turn 2 was rapidly receeding.
Turn four was the final turn. On his turn, he assaulted on the left, killing teh mortars and some infantry, and driving the rest off the objective. I tried to motivate to counter assault, and failed. Kommissar tried to "motivate". And failed. Stupid Kommisar.
While I was able to move back on to contest the object on the bottom of the turn, the left was going to be, at best, a stalemate for me. With a bit of luck, I could keep him from claiming it, but I lacked the resources to drive him off / destroy him.
On the right, his tank destroyers had line of sight to the tanks I'd moved up to shoot. They used it, and destroyed the Shermans in a position to do anything usefull.
With three of my tanks bailed or bogged, this took me below half strength on the M4 company, which promptly failed a morale check, and ran. I really want to hate those TDs, but it's hard, 'cause they're so pretty:
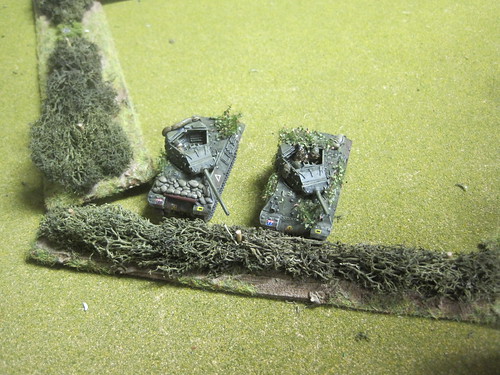

What is it with me and tank destroyers? The FoW boards are full of people grumbling about how useless they are, but the shoot the hell out me every time I play against them.
It was getting late, so I conceded on my turn 4. Ordinarily, I dislike doing this, but to be honest, had we had the time to play the last couple of turns, he would have won. With no AT assets left to speak of (1 flamethrower stand, with luck, meant one successful assault against one armoured platoon), I probably could contest my objectives until time ran out, but there was no way I was going to take his. He was ahead on platoon kills, and even without the objective, would win when time ran out. In fact, all he had to do to win was pull back to defend his objective.
It was a good game. In retrospect, a heartbreaker, but at the time, I didn't realize how critical that failed infantry motivation roll in turn 2 was. Lessons form Losing PT. IV: When attacking, infantry must keep moving. Losing momentum means losing the game.
Lessons from Losing Pt. V: There's more than one way to win. Having lost momentum on the right, what I probably should have done is dig in. There's no way he would have chewed through that much infantry once they were in foxholes, and I could bring my tanks back and around to snipe his units. While that meant giving up on an objective win, I could have tried for a win by points or forcing his company to break.
Once again, Sodbuster was a terrific opponent. He used strengths of his army and the terrain well, and earned himself a solid win. Thanks to the Dueling Grounds for the playing space, and to the THMG for terrain.
TMtW
"What is it with me an tank destroyers? The FoW boards are full of people grumbling about how useless they are, but the shoot the hell out me every time I play against them."
ReplyDeleteUnless I am wrong- you primarily play against the British versions yes? The American version are overcosted and fiddly. Also, people often screw up the rule where they are "forced to disengage". This means if even 1 US Tank destroyer is bailed or destroyed, the unit must pass a motivation check. If failed, they have to spend the following turn reorganizing and are essentially useless. British M10s are GREAT. They're a great buy, and up-gunned.
Great looking game though! really good terrain and models!
Great report on difficult terrain and against an infantry company's wort nightmare. Soviet infantry can be very good to attack with once you get the hang of them, but playing against Cromwells will always be very tough.
ReplyDeleteCdlT